Category Archives: ALL Tutorials

Free Version of Avid Media Composer

GeniusDV recently took a test drive of Avid Technology’s FREE version of Avid Media Composer.  The free version is  called ‘Avid First

The free version is FULLY functional with some limitations.  From what I’ve discovered, the free version is perfectly suitable for learning Avid Media Composer.  However, full-time editing professionals will certainly want to upgrade to the full version of Media Composer.

Surprisingly, the free version of ‘Avid First’ provides almost every editing feature available within the paid version of Avid Media Composer.

I was able to edit an entire commercial with multiple video tracks, titles, voice-over, music, and sound effects within 30 minutes.

In some ways the ‘Avid First’ interface has been refreshed.  Simple things have been changed.  For example, the source tracks now appear in green.  This helps differentiate between source and record tracks.

All of Avid’s powerful editing functions are included with ‘Avid First’  including (trim mode, replace edit, match frame, top/tail editing, etc.)

Other advanced features included within ‘Avid First’ include:

  • Flame Flex (ability to reference 4K + files)
  • Full Color Correction Workspace
  • 3D Warp Controls
  • Advanced Keyframing
  • Animated Paint Controls
  • Nesting and Collapsing of Tracks (which essentially  negates the limitation of 4 video tracks.)
  • Customization of the Interface and Window Views
  • Keyboard Mapping
  • Advanced Audio Keyframing Controls

If you are considering learning Avid Media Composer, downloading ‘Avid First’ is an absolute must to become familiar with the editing interface.

Limitations of the free version that I’ve discovered include:

  • Maximum number of video tracks – 4
  • Maximum number of audio tracks – 8
  • Limited Multi-Cam editing (angles only available in source window)
  • Limited Chroma Key Capability (no spectra matte)
  • Only the basic ‘legacy’ Title tool is included (no Marquee option)
  • No ability to animate mattes
  • Limited slow motion capabilities (no Time Warp functions)
  • No Plasma Wipe Transitions
  • Limited options for transcoding media
  • Limited to editing in HD resolution (no 4K format option)
  • Limited Real-time Audio Plugins
  • No audio punch in feature (meaning – the ability to record audio directly to timeline)
  • Limited User Settings (no ability to create additional user profiles)
  • Bins from ‘Avid First’ cannot be opened up in the retail version of Avid Media Composer.
  • You cannot have ‘Avid First’ and the full retail version of’ Avid Media Composer’ installed on the same system.

I’m sure there are some other minor limitations that I have not come across.  Feel free to leave a comment if you find specific items that are missing from the full version of Avid Media Composer.

Then, when you a ready to become an Avid Certified User, take a look at GeniusDV’s certified Avid Media Composer Training Options.

Make sure you read the list of Avid’s minimum system requirements before downloading the software.

Installing the free version of Avid Media Composer is a bit tricky.  Here are the steps:

  • Navigate to the ‘Avid First’ website at:  http://www.avid.com/media-composer-first. Click on the orange ‘Get it now for free’ button in the upper right corner.
  • Create an Avid Master Account
  • Log into your email and Verify your email address
  • Tell Avid Technology about yourself, and then Download the software.

Navigate to your downloads folder and install the ‘Avid First’ software.

Note: If you are running ‘Avid First’ on a MAC, when you attempt to un-compress the .dmg file you will need navigate to your security preferences.

Navigate to the system preferences,  and choose Security and Privacy.  Within the General tab, click on the button that says Open Anyway.

After the .dmg is uncompressed, You will need to repeat this process again in order to launch the ‘Avid First installer’

After everything is  installed, you need to make sure you launch Avid’s Application Manager in order to run ‘Avid First’

Note:  You must have a live active internet connection to log into Avid’s Application manager to run ‘Avid First’.

If you lose your internet connection, ‘Avid First’ will automatically close on you.


After Effects Rotoscope Tutorial

GeniusDV now offers LIVE one-on-one remote training and on-site training.  Call to enroll!


Check out our recent testimonials!

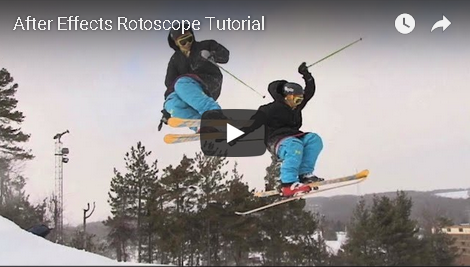
Check out this tutorial on using the Rotobrush tool using Integration between Adobe Premiere and After Effects.

Learn from our Emmy Award winning instructor ‘Jaun Carlos’

Please note: This tutorial was created on MAC OS X.

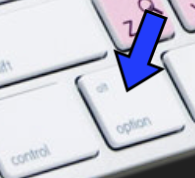
The  alt / options keys are the  same key on a standard Mac / PC keyboard


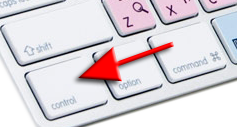
The Command key is the same as the  Control key on a PC

The term rotoscope refers to a lengthy process of tracing around an object for each frame within a video segment.

Fortunately, the Adobe Create Suite of products makes this process easier.

For this tutorial, I downloaded the clip segment using a free subscription at Video Blocks.com.

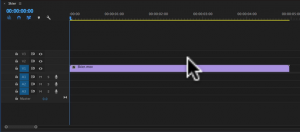
Drag a movie file directly to the Adobe Premiere timeline.

Premiere will automatically create a sequence along with the imported segment.

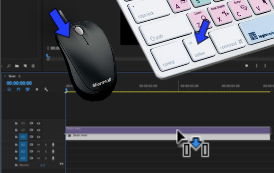
Hold down the alt key and left click on the clip segment.

While holding down the alt key drag the segment straight up and release the mouse button before letting go of the alt key.

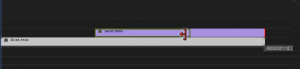
This will create an exact duplicate of the clip segment onto the Video 2 track.

Trim the segment on Video 2 for an area you want to rotoscope.

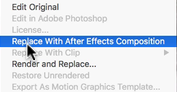
Right click on the V2 segment and choose replace with After Effects Composition.

Give the project a name and save.

Now you have an After Effects project linked to your clip segment within Adobe Premiere.

After Effects will now open.

Double click on the segment layer within the After Effects Timeline

In doing so, you will now be able to use the Rotobrush tool on the segment layer.

In the upper left corner of the After Effects interface, click on the rotobrush tool within the After Effects toolbar.

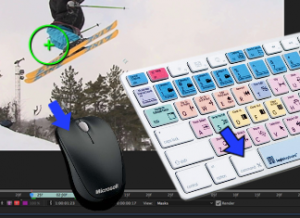
To resize the brush, hold down the left mouse button and drag upwards to increase its diameter.

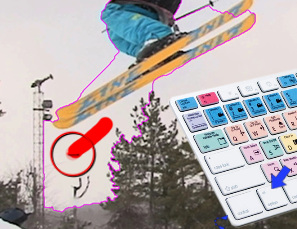
Use the keyboard shortcut command + to zoom into the composition window.

Then, hold down the space bar to maneuver within the zoomed area.

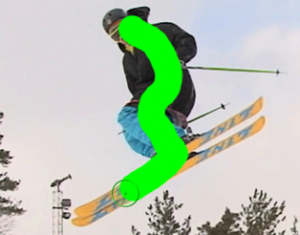
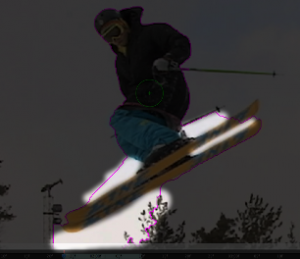
Paint over an area using the green roto brush for an area you want to cut out.

After Effects will make its best guess on selecting the area.

The roto for my skier looks fairly good with the exception of a few areas.

To remove unwanted areas from your roto, hold down the alt key and paint away the areas with the red brush.

The green brush adds areas, and the red brush removes areas.

In this example, it’s going to be tricky to get the ski poles.

Remember, You can zoom in/out of the composition window using the command +/- keys.

After you have a basic roto for the first frame around your subject, press the space bar to let After Effects follow the rotoscope for the rest of the frames.

The last step is to spot check each individual frame by using the keyboard shortcut command left arrow to advance one frame at a time.

Repeat this process until your roto looks good.
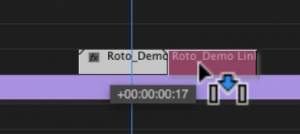
After you’ve completed the roto, navigate to the lower right corner of the composition window and click on the freeze button to lock in the rotoscope data.

Then navigate to the file menu and choose save.

In doing so, you can quit or minimize After Effects, and it will update your segment within the Adobe Premiere timeline.

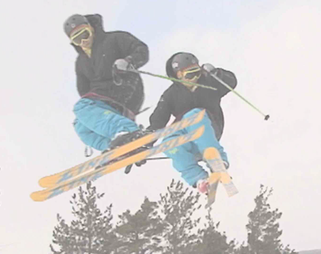
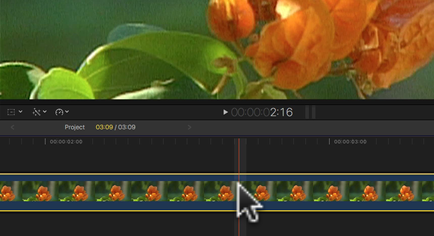
Within adobe premiere, turn off the eyeball for the V1 track, and you will see the cut out of your object on V2.

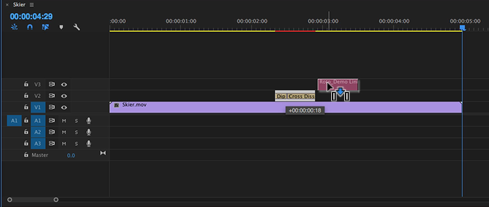
Offset the V2 Segment by dragging it to the right by a few frames.

Play back the result and you should see something like this:

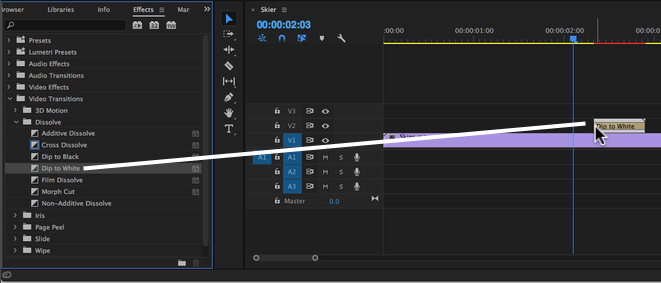
Navigate to the effects palette and drag the dip to white transition at the beginning of the segment on V2.

Double click on the transition effect with the segment and give it a duration of 5 frames.

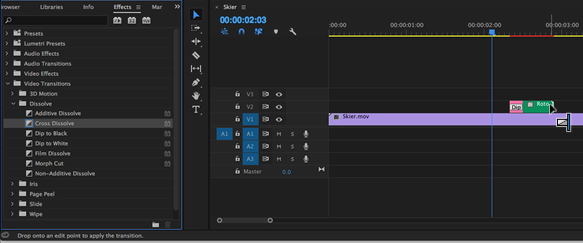
Then go back to the effects palette and drag a dissolve for the ending transition.

To complete this effect,  duplicate the clip segment we did earlier by holding down the alt key and then the dragging the segment straight up onto V3 track and then releasing the mouse button to create another offset.

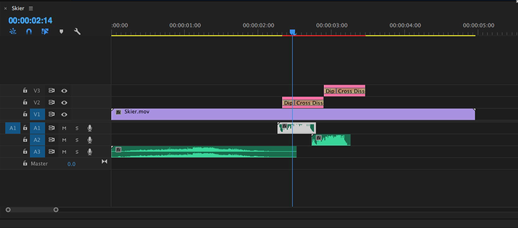
The last step is to add some sound effects to the timeline.

If you need great quality sound effects you can download them with a free subscription to audioblocks.com.

For other great tips like this visit GeniusDV.com, and check into enrolling in a hands-on course.
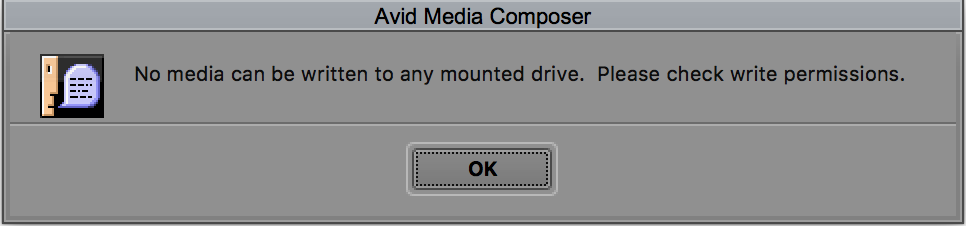
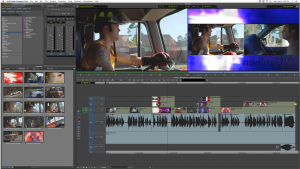
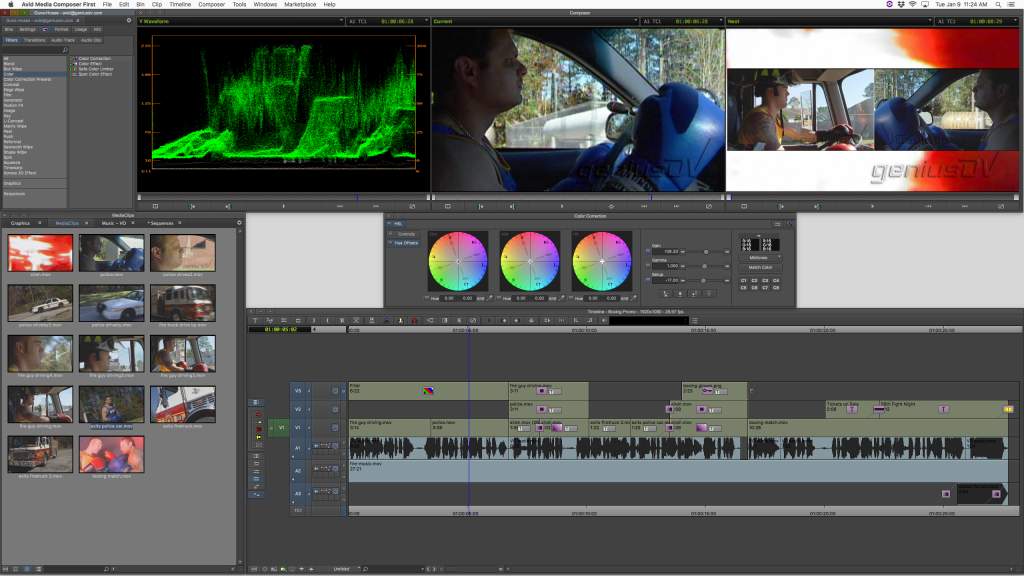
End of Final Cut Pro 7 with High Sierra

Yes, it’s true.  If you update to High Sierra, the Final Cut Pro  7 Studio Applications will no longer launch.  This also includes applications such as SoundTrack Pro, etc.


If you upgrade to Mac OSX High Sierra,  it’s very difficult to revert back to an older OS X version.

This will force users who have been hanging onto Final Cut Pro 7 to move onto other software products.

Apple is forcing Final Cut Pro 7 Studio users to move to Final Cut Pro X.

If you are still an active Final Cut Pro 7 user, DO NOT upgrade to High Sierra if you need access to current or legacy Final Cut Pro 7 projects.

With that being said, consider using GeniusDV training services to migrate to other video editing software products. We currently  offer hands-on, and online courses for:

Pleasantville Effect in Final Cut Pro X

It’s easy to create the Pleasantville or Schinlder’s list effect in Final Cut Pro X.

Check it out!

This tutorial has been updated for Final Cut Pro X 10.3.X

Start by clicking on a clip segment within the timeline area.
Then open the effects browser window.

Look for the Color Correction Effect and double click on it.

In doing so, this will add the color correction effect to the inspector window.

Navigate to the right hand corner of the Color Correction Parameter and click on the mask icon.

To isolate a specific color, choose Add Color Mask from the contextual menu.

Navigate back to the mask icon and choose Invert Masks.

With the eye dropper tool activated navigate to the viewer window and hold down the left mouse button to select a range of color you want to protect.

Navigate back to the inspector, and click on the side arrow for the Color Board.

Then click on the saturation tab.

Off to the left drag the saturation slider all the way to the bottom.
Okay, that’s it! Check it out.

After you preview the result, hold down the shift key or the option key to add or remove color values to fine tune.

For other great tutorials like this, please subscribe to our channel or contact GeniusDV for hands-on Final Cut Pro X training.