Category Archives: Adobe CC

GeniusDV offers a 3 or 5 day comprehensive hands-on course for learning the Adobe CC video applications, which include Adobe Premiere, Photoshop, After Effects, Audition, Media Encoder, and Cinema 4D LT

Reset Photoshop Preferences

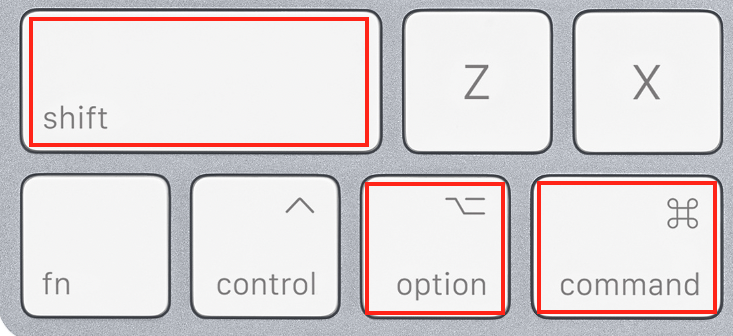
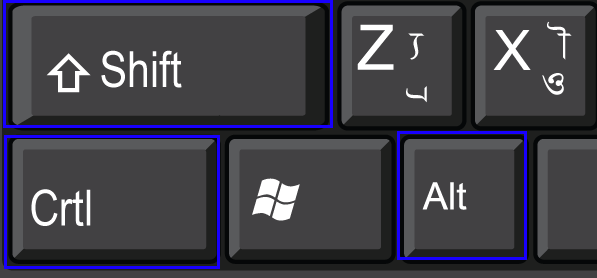
To reset the Photoshop preferences back to it’s original default, hold down the following short-cut keys for PC/MAC.

Nothing is more frustrating than trying to follow a tutorial on photoshop that doesn’t work.

GeniusDV has over 300 great video training tutorials! All our tutorials are built with the ‘DEFAULT’ preferences on a specific version of software.

To reset Photoshop back to it’s default preference settings hold down the following keys right before launching the application

MAC: COMMAND + OPTION + SHIFT

HOLD DOWN MAC MODIFIER KEYS TO RESET PHOTOSHOP WHILE LAUNCHING SOFTWARE

PC: CONTROL + OPTION + SHIFT

HOLD DOWN PC MODIFIER KEYS TO RESET PHOTOSHOP WHILE LAUNCHING SOFTWARE

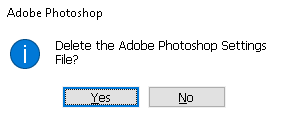
A dialogue box should immediately appear before Photoshop continues to Launch.

Keep in mind this will reset ALL your Photoshop preferences. This is no UNDO. However, i’ve found it is sometimes necessary if some crazy preference got changed preventing you from continuing forward.

After Effects Rotoscope Tutorial

GeniusDV now offers LIVE one-on-one remote training and on-site training.  Call to enroll!


Check out our recent testimonials!

Check out this tutorial on using the Rotobrush tool using Integration between Adobe Premiere and After Effects.

Learn from our Emmy Award winning instructor ‘Jaun Carlos’

Please note: This tutorial was created on MAC OS X.

The  alt / options keys are the  same key on a standard Mac / PC keyboard


The Command key is the same as the  Control key on a PC

The term rotoscope refers to a lengthy process of tracing around an object for each frame within a video segment.

Fortunately, the Adobe Create Suite of products makes this process easier.

For this tutorial, I downloaded the clip segment using a free subscription at Video Blocks.com.

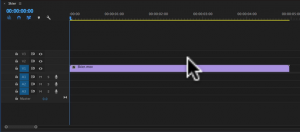
Drag a movie file directly to the Adobe Premiere timeline.

Premiere will automatically create a sequence along with the imported segment.

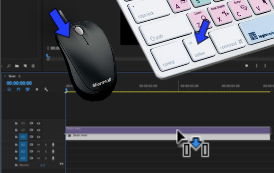
Hold down the alt key and left click on the clip segment.

While holding down the alt key drag the segment straight up and release the mouse button before letting go of the alt key.

This will create an exact duplicate of the clip segment onto the Video 2 track.

Trim the segment on Video 2 for an area you want to rotoscope.

Right click on the V2 segment and choose replace with After Effects Composition.

Give the project a name and save.

Now you have an After Effects project linked to your clip segment within Adobe Premiere.

After Effects will now open.

Double click on the segment layer within the After Effects Timeline

In doing so, you will now be able to use the Rotobrush tool on the segment layer.

In the upper left corner of the After Effects interface, click on the rotobrush tool within the After Effects toolbar.

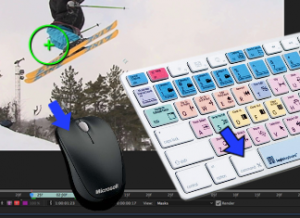
To resize the brush, hold down the left mouse button and drag upwards to increase its diameter.

Use the keyboard shortcut command + to zoom into the composition window.

Then, hold down the space bar to maneuver within the zoomed area.

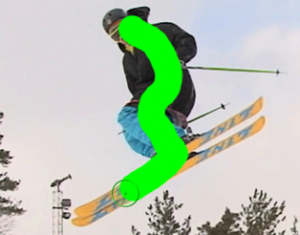
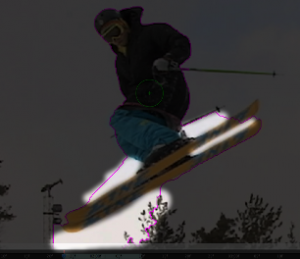
Paint over an area using the green roto brush for an area you want to cut out.

After Effects will make its best guess on selecting the area.

The roto for my skier looks fairly good with the exception of a few areas.

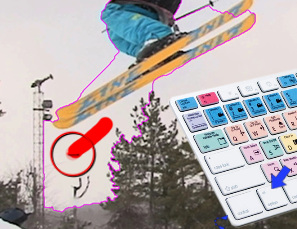
To remove unwanted areas from your roto, hold down the alt key and paint away the areas with the red brush.

The green brush adds areas, and the red brush removes areas.

In this example, it’s going to be tricky to get the ski poles.

Remember, You can zoom in/out of the composition window using the command +/- keys.

After you have a basic roto for the first frame around your subject, press the space bar to let After Effects follow the rotoscope for the rest of the frames.

The last step is to spot check each individual frame by using the keyboard shortcut command left arrow to advance one frame at a time.

Repeat this process until your roto looks good.
After you’ve completed the roto, navigate to the lower right corner of the composition window and click on the freeze button to lock in the rotoscope data.

Then navigate to the file menu and choose save.

In doing so, you can quit or minimize After Effects, and it will update your segment within the Adobe Premiere timeline.

Within adobe premiere, turn off the eyeball for the V1 track, and you will see the cut out of your object on V2.

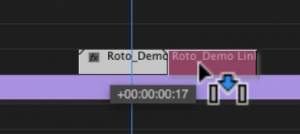
Offset the V2 Segment by dragging it to the right by a few frames.

Play back the result and you should see something like this:

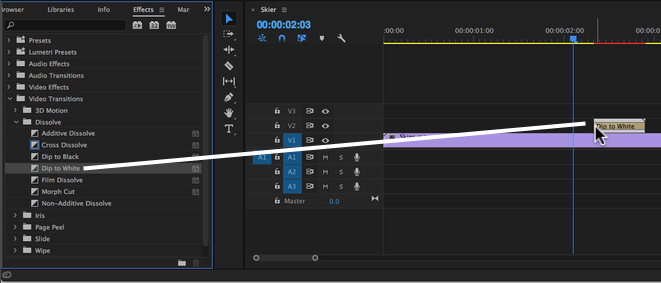
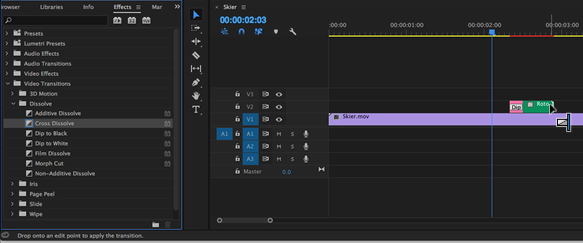
Navigate to the effects palette and drag the dip to white transition at the beginning of the segment on V2.

Double click on the transition effect with the segment and give it a duration of 5 frames.

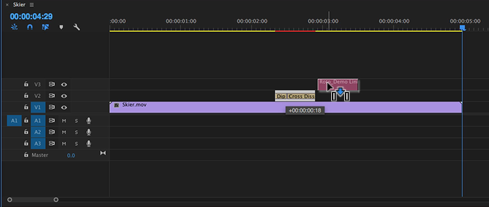
Then go back to the effects palette and drag a dissolve for the ending transition.

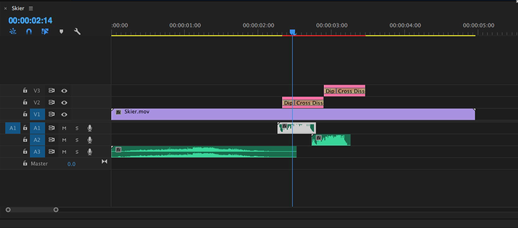
To complete this effect,  duplicate the clip segment we did earlier by holding down the alt key and then the dragging the segment straight up onto V3 track and then releasing the mouse button to create another offset.

The last step is to add some sound effects to the timeline.

If you need great quality sound effects you can download them with a free subscription to audioblocks.com.

For other great tips like this visit GeniusDV.com, and check into enrolling in a hands-on course.

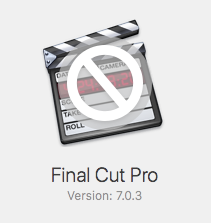
End of Final Cut Pro 7 with High Sierra

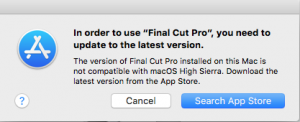
Yes, it’s true.  If you update to High Sierra, the Final Cut Pro  7 Studio Applications will no longer launch.  This also includes applications such as SoundTrack Pro, etc.


If you upgrade to Mac OSX High Sierra,  it’s very difficult to revert back to an older OS X version.

This will force users who have been hanging onto Final Cut Pro 7 to move onto other software products.

Apple is forcing Final Cut Pro 7 Studio users to move to Final Cut Pro X.

If you are still an active Final Cut Pro 7 user, DO NOT upgrade to High Sierra if you need access to current or legacy Final Cut Pro 7 projects.

With that being said, consider using GeniusDV training services to migrate to other video editing software products. We currently  offer hands-on, and online courses for:

Missing Pro Res Export Options

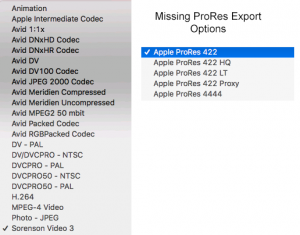
If you are running Avid Media Composer and/or Adobe Premiere and you are missing the Pro-Res Export options within Mac OS X.  There is a fix!


  • Download the new Pro Video Formats from Apple.com

http://support.apple.com/downloads/DL1898/en_US/provideoformats.dmg

  • Reboot the computer in safe mode by holding down the shift key immediately after you reboot the computer.
  • Waiting for the operating system to load in ‘safe mode’
  • Then double click on provideoformats.dmg to install.

Missing ProRes Video Codecs

Special thanks to Ed Gfeller for all his research for this information. You can reach out to Ed by checking out his last two documentaries:

Grover Professor of Books
The Langford Resort Hotel Winter Park, FL