Category Archives: Final Cut Pro X

End of Final Cut Pro 7 with High Sierra

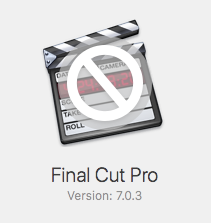
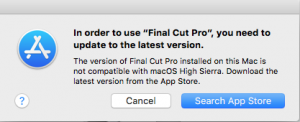
Yes, it’s true.  If you update to High Sierra, the Final Cut Pro  7 Studio Applications will no longer launch.  This also includes applications such as SoundTrack Pro, etc.


If you upgrade to Mac OSX High Sierra,  it’s very difficult to revert back to an older OS X version.

This will force users who have been hanging onto Final Cut Pro 7 to move onto other software products.

Apple is forcing Final Cut Pro 7 Studio users to move to Final Cut Pro X.

If you are still an active Final Cut Pro 7 user, DO NOT upgrade to High Sierra if you need access to current or legacy Final Cut Pro 7 projects.

With that being said, consider using GeniusDV training services to migrate to other video editing software products. We currently  offer hands-on, and online courses for:

Missing Pro Res Export Options

If you are running Avid Media Composer and/or Adobe Premiere and you are missing the Pro-Res Export options within Mac OS X.  There is a fix!


  • Download the new Pro Video Formats from Apple.com

http://support.apple.com/downloads/DL1898/en_US/provideoformats.dmg

  • Reboot the computer in safe mode by holding down the shift key immediately after you reboot the computer.
  • Waiting for the operating system to load in ‘safe mode’
  • Then double click on provideoformats.dmg to install.

Missing ProRes Video Codecs

Special thanks to Ed Gfeller for all his research for this information. You can reach out to Ed by checking out his last two documentaries:

Grover Professor of Books
The Langford Resort Hotel Winter Park, FL

Pleasantville Effect in Final Cut Pro X

It’s easy to create the Pleasantville or Schinlder’s list effect in Final Cut Pro X.

Check it out!

This tutorial has been updated for Final Cut Pro X 10.3.X

Start by clicking on a clip segment within the timeline area.
Then open the effects browser window.

Look for the Color Correction Effect and double click on it.

In doing so, this will add the color correction effect to the inspector window.

Navigate to the right hand corner of the Color Correction Parameter and click on the mask icon.

To isolate a specific color, choose Add Color Mask from the contextual menu.

Navigate back to the mask icon and choose Invert Masks.

With the eye dropper tool activated navigate to the viewer window and hold down the left mouse button to select a range of color you want to protect.

Navigate back to the inspector, and click on the side arrow for the Color Board.

Then click on the saturation tab.

Off to the left drag the saturation slider all the way to the bottom.
Okay, that’s it! Check it out.

After you preview the result, hold down the shift key or the option key to add or remove color values to fine tune.

For other great tutorials like this, please subscribe to our channel or contact GeniusDV for hands-on Final Cut Pro X training.