All posts by GeniusDV

Upgrade Your 3D Design Skills with GeniusDV

For this year, get energized! .Enhance your expertise in industry-leading software for video editing and image processing tools.We are celebrating our 25th anniversary and we are pleased to offer special customized one-on-one training sessions designed to help you master the following powerful platforms:
What software do you want to learn?

V-Ray Dive into advanced rendering techniques to produce realistic visualizations and images.
SketchUp
Learn intuitive 3D modeling for architecture, interior design, and more.
BlenderAcquire skills in 3D creation, animation, and visual effects.
Lumion 3DDiscover how to create stunning architectural renderings and animations with ease.
Z BrushMaster digital sculpting for character design and complex modeling projects.

All training is tailored to your unique needs, ensuring that you receive focused guidance and practical skills. Take advantage of this special opportunity to advance your knowledge and celebrate GeniusDV’s milestone anniversary.

Contact us, and we will share additional details!

New Audio Waveform Display Options in Avid Media Composer

If you are new to Media Composer, or if you are considering upgrading to the newest software version, there are some new features when working with audio waveforms.

Source Side Audio Waveforms in Avid Media Composer

Watch this short tutorial, on new audio waveform display options within the timeline and source window.

The latest version of Avid Media Composer is 2025.6. You can download this by logging into www.avid.com and accessing the Avid downloading center.

This version is also qualified for Windows Pro 11, and Mac OS 15.5 (Sequoia).


FREE NAB 2025 (NATIONAL ASSOCIATION OF BROADCASTERS) PASS

Hi everyone: Heads up!  One of the ways GeniusDV has become successful is from networking. 

The largest digital video / broadcasting networking show in the United States is called the NAB. (National Association of Broadcasters).  GeniusDV has attended this conference for 27 straight years!  If you have the budget, I highly recommend that you attend.  

We are able to share with you a FREE pass. You only have until Jan 31 to take advantage of the free pass. If you are able to attend, please reach out to us and we can meet up.

This is conference is a moment where you can meet with CEO’s / Engineers / AI Designers, etc.  It’s REALLY hard these days to get a REAL phone number from someone.  However, at this conference you can meet with REAL people with a REAL phone number and have a REAL conversation.

Conference runs from April 5-9 in Las Vegas. 

This regular conference price is $219 dollars to attend!  So, if you enroll before Jan 31st. DO NOT PAY! 

Use code ERA1 for a FREE Exhibits Pass and a 10% Off Discount on Premium Conference and All Access Passes! Offer expires on January 31, 2025.  

Click on the link below to register with that above free code.
https://www.nabshow.com/

There are mini-seminars that are included with the basic pass that you won’t be charged for. They also have A LOT of training sessions that cost’s $$.  If this your first time attending -I recommend you just walk the show floor which is several square miles!

You can register even if your not sure if you can make the conference.  

I recommend visiting the Adobe, BlackMagic (i.e, DaVinci), , Avid, Sony, Panasonic, Red Camera booths first.

We’ve attached a couple of pictures of past venues.

https://www.geniusdv.com/tutorials/wp-content/uploads/2025/01/VR-Bird.png


Adobe Effect Effects Demonstration

https://www.geniusdv.com/tutorials/wp-content/uploads/2025/01/Star-Wars-Light2.jpg

My friend using the modern Steady Cam Equipment.  
You’ve probably seen this at NFL or NAB Games.  

https://www.geniusdv.com/tutorials/wp-content/uploads/2025/01/SteadyCam.png


Click on the link below for the video of
modern stabilization equipment. 
https://www.dropbox.com/t/66FEoIFAxrfQJ5GP

Typical set-up where you can test high-end Cameras

Watch the full video here.

https://www.dropbox.com/t/PN80COUr4jGanKSM

If possible, I will issue extra credit to anyone who can attend the conference!

John

NEW Media Composer and Pro Tools Course Offerings

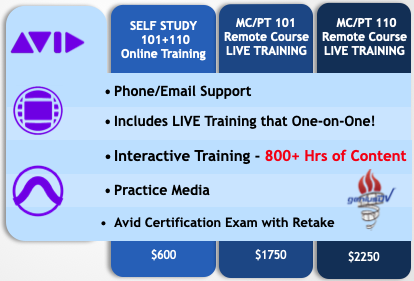
At GeniusDV, we are excited to announce new affordable training options for all courses that Avid Technology offers.

You can take the interactive courses at your own time 24/7 over a 3 month period and save your progress. Plus, the core Media Composer and Pro Tools Courses come with additional LIVE One-On-One Training, with the opportunity to become certified!

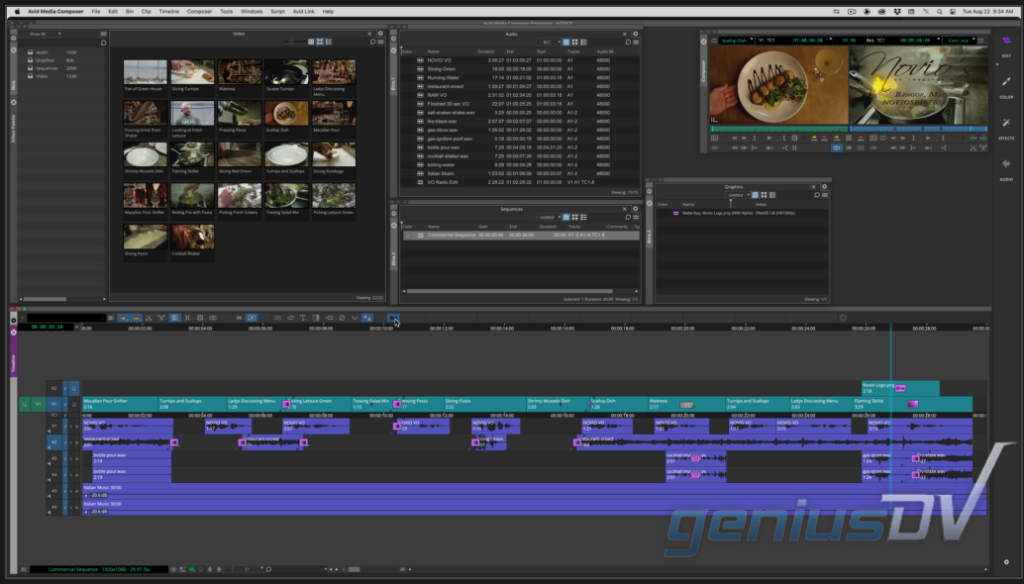
Click on the Screenshot below to watch a short video that was edited all within Avid.

Play YouTube Video

It’s doesn’t matter which course option you pick, you can request access to Avid’s 800+ hours of remote interactive content! No Extra Charge!

Course Pricing

Core MC-PT Courses Include:

  • Phone / Email Support
  • Interactive Remote Web Training
  • Live One-on-One Training also Included!
  • Practice Media / Practice Exams
  • Pro Tools / Media Composer Certification Exams(s)

The great thing about these courses, is that you take take them at your own pace (24/7) with the ability to save your progress. And, remember LIVE One-On-One Training is also provided.

Media Composer Self Study Course Options
Media Composer (MC 101-110 -120)

Pro Tools Self Study Course Options
Pro Tools (PT 101, 110, 201, 210M, 210P)

You will also have access to the following courses:

Avid Media Composer Replace Edit Function

In Avid Media Composer I have a top ten list of keyboard shortcuts.  The replace edit function ranks towards to the top.

Once you learn how to use the replace edit function, it will dramatically speed up your editing workflow.

Replace Edit Tutorial in Avid Media Composer

The basic science behind using the replace edit function is that you only need press ONE button to make an edit into your sequence! You DO NOT need in-out points. It’s Just ONE click.

It’s based on a sync point to fill the area of a segment in your timeline. Done! However, there are some caveats to learn.

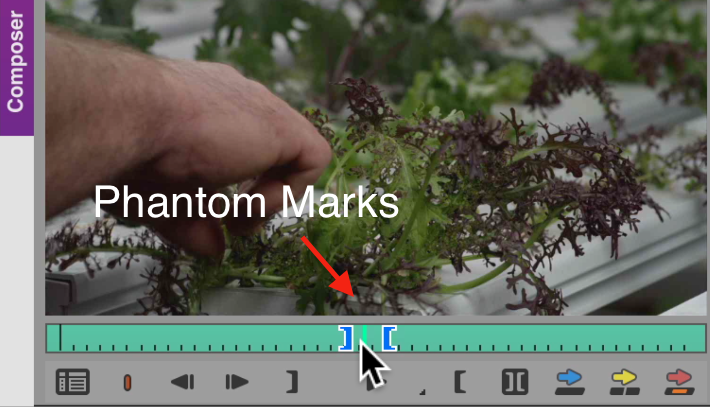
Also, there is a feature called ‘Phantom Marks’ that will let you preview the area of a segment that needs to be replaced.

Let us know if this video tutorial is helpful! If so, please favorite the YouTube Video.

And as always, we provide customized one-on-one Media Composer certified training courses (remotely) if you are looking to upgrade your skills or becoming an Avid Certified Specialist.

You can also assess your current knowledge by taking our FREE Avid Media Composer Practice Exam.

Ultra Slow Motion in Avid Media Composer using Mixed Frame Rates

Here’s a short tutorial on how to create super slow motion effects in Media Composer.

This may save you a lengthy process of having to process the frames in a different software package such as Adobe After Effects.

A couple of short notes that were not mentioned in this tutorial.

For this to work, you need to a video clip that exceeds your project’s frame rate. If you want to follow this tutorial on your own, here is a copy of the media used.

Slow Motion Clip 240 fps.

*If you are linking to clips directly as shown in the video, you will need to transcode the clip(s) to managed media in order to export a video.

If you need assistance on how why it’s important to transcode linked clips to managed media, you can watch the tutorial below.

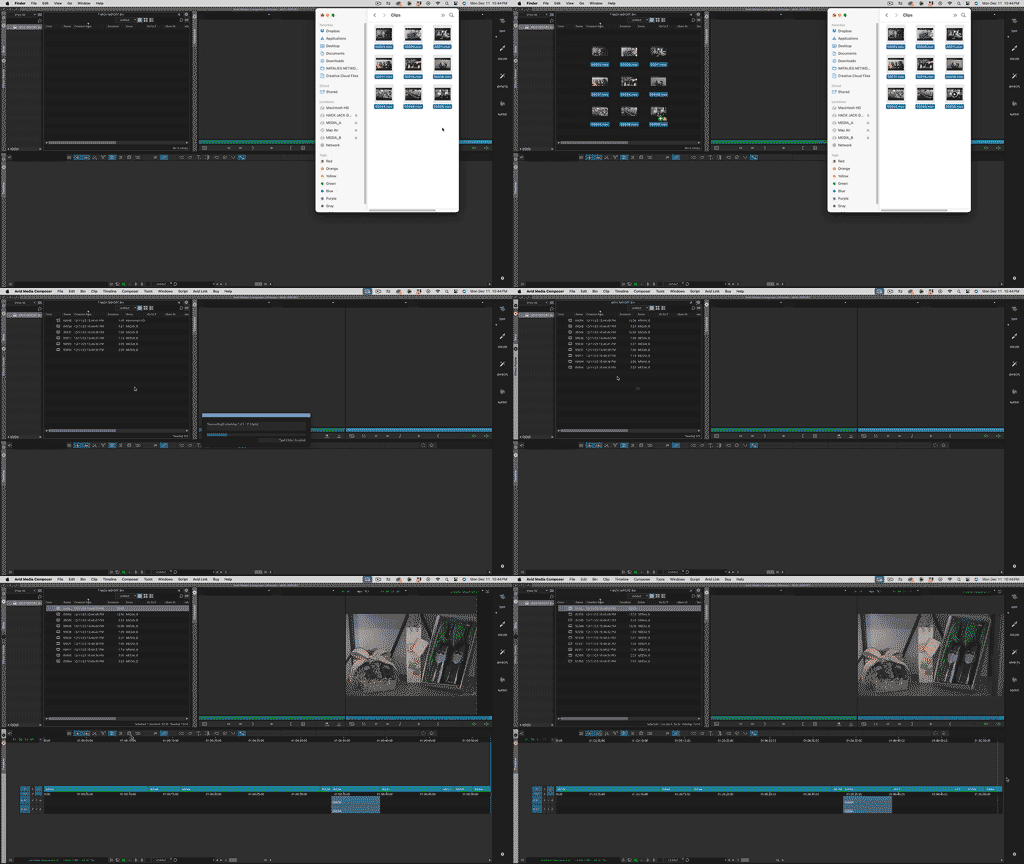
Using the Source Browser Window

Using the Source Browser Window in Avid Media Composer

The Source Browser Window allows you to preview video content before bringing it into a Bin.

This Tutorial will show you how to:
– Create Favorites to access commonly used Directory paths
– Preview Media before linking to it
– Transcode Linked files for better system performance
– Linking to media from Multiple Folders

Check out this video tutorial!

Using The Source Browser Window – Avid Media Composer

Bin Layouts in Avid Media Composer

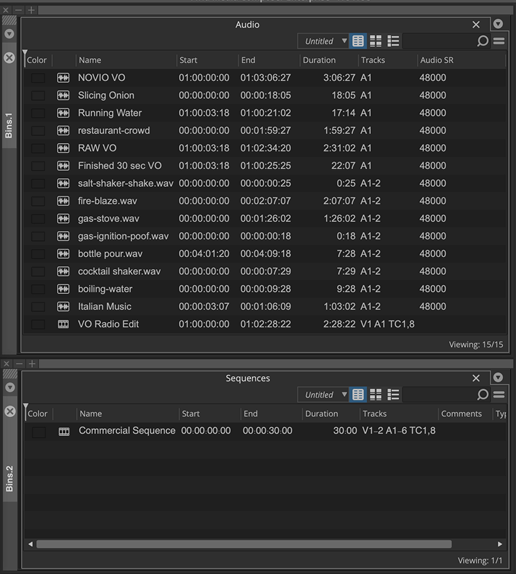
A relatively new feature in Media Composer is the ability to create Bin Layouts with the ability to save them to a shortcut key.

Media Composer Bin Layouts. Click image to play ‘Avid Bin Layout video tutorial.
Example of Bin Layout in Avid Media Composer.

Mastering Bin Layouts can speed up your workflow. A Bin Layout gives you the ability for the following:

  • Save the location of all your Bin Containers (including across multiple screens)
  • It remembers the number of Bin Tabs within each Bin Container
  • The arrangement of Bins with a Bin Container (see screenshot below)
  • You can create shortcut buttons that can be mapped to a toolbar
  • You can map your Bin Layouts to a shortcut key on your keyboard.
Two Bin Tabs within one Media Composer Bin Container
Example of Bin Layouts within Avid Media Composer

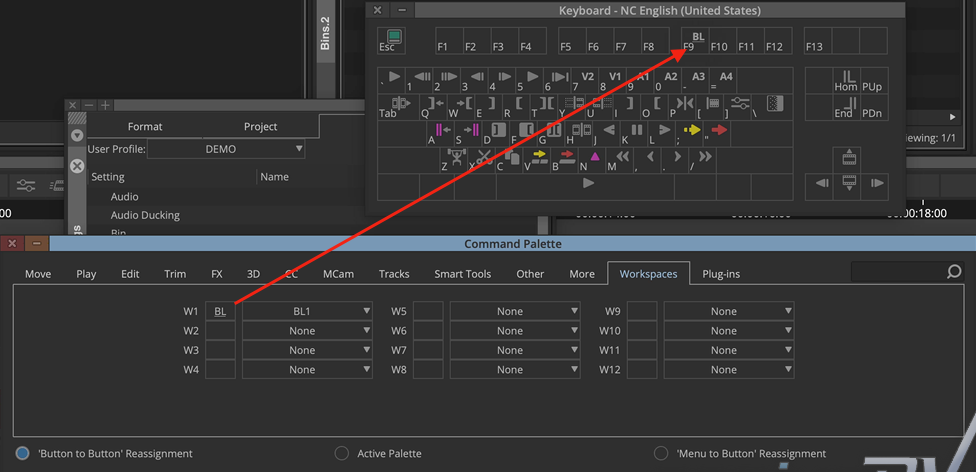
To Map a Bin Layout to a keyboard shortcut, or a button to a toolbar:

– Navigate to the Command Palette.
– Click on the Workspace Tab.
– Change W1 to your first saved Bin Layout (BL1)

Configure W1 (Workspace) to first Saved Layout
Drag Bin Layout to Keyboard

Now you can press a single button, or a keyboard shortcut to automatically map all your Bin Containers to a specific area within Avid Media Composer’s background panel.

For other great tips like this, and/or if you are interested in becoming an Certified Avid Media Composer Specialist , visit GeniusDV.com.


Time Warp Effect in Avid Media Composer

It’s easy to create a speed ramp effect in Avid Media Composer. Check out this short tutorial using the Time Warp Effect.

Media Composer Speed Ramp – Time Warp Effect

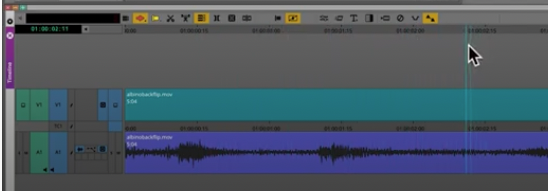
Start by parking over a clip segment that needs to be time-warped.

Clip Segment

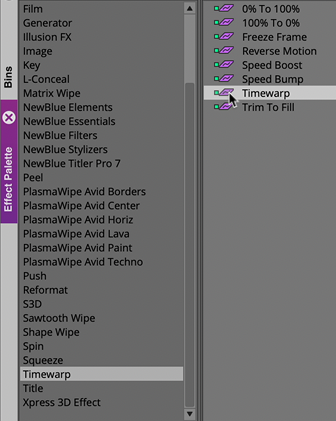
Look for the Time Warp effect within the Effect Palette.

Time Warp Effect Category.

Drag the Time Warp effect onto a clip segment.

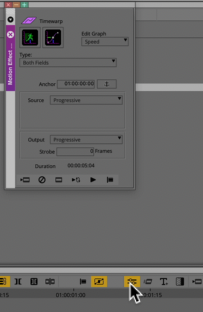
Then, click on the Effect Mode Button to bring forward the Motion Effect Editor window.

Motion Effect Editor

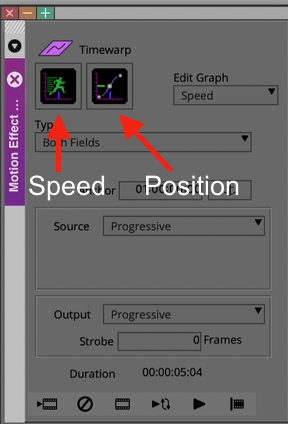
Within the Motion Effect Editor, click on the Speed and Position graph buttons. This will open the Speed and Position windows.

Speed – Position Graph buttons

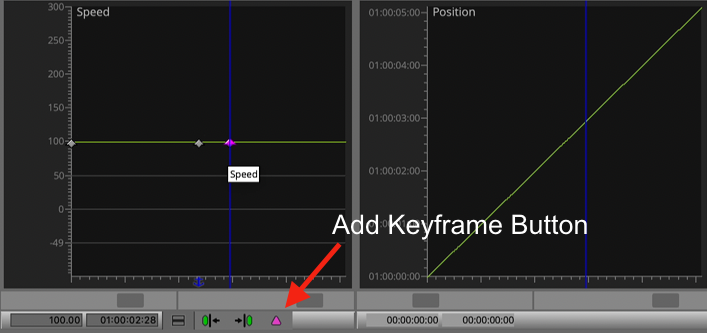
Add a keyframe on the in the Speed Graph Window.

Off to the right hand side within the Position Graph window, you will see where the clip segment starts and ends.

Add Keyframe

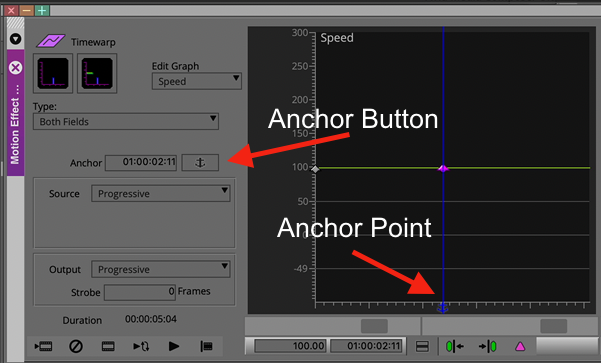
Press the Add Anchor Button to set the keyframe as an anchor point.

Set Anchor Point

Move the blue position indicator forward 1/2 second, and add another keyframe.

Add Keyframe

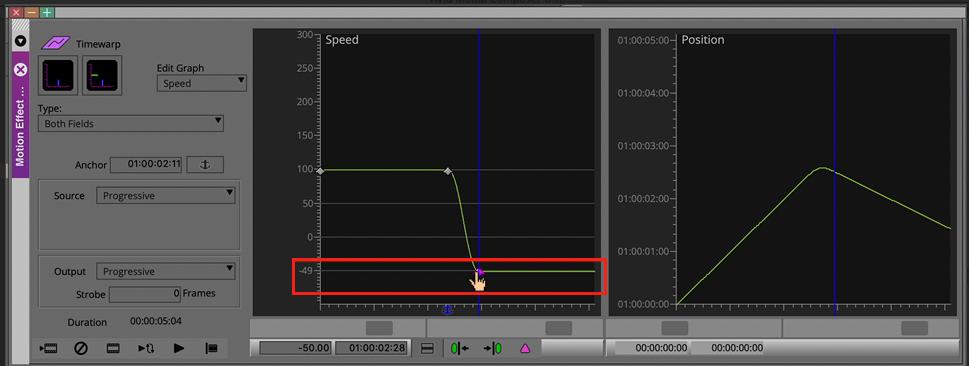
Within the speed graph window, drag the second keyframe to roughly -50% Percent. This will cause the video clip segment to play backwards.

Notice how the position graph slopes downward based on the -50% speed change.

Speed Change

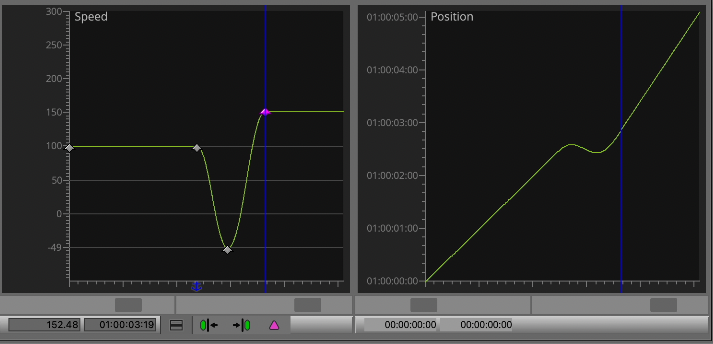
Then move the position indicator forward another half second forward and add another keyframe.

Move the third keyframe up until the position graph lands in the upper right hand corner.

Speed – Position Graph

That’s it, go ahead and play the sequence!

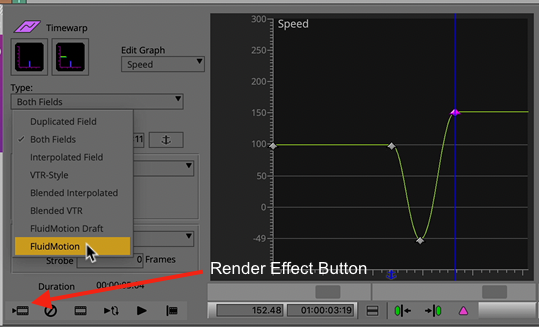
For extra smooth slow motion, set the render type to Fluid Motion. If you choose this option, you will need to render the effect.

Fluid Motion Render Type

You can watch the Time Warp YouTube Tutorial here.