
Check out this short tutorial on how to use Blend Modes within Avid Media Composer!

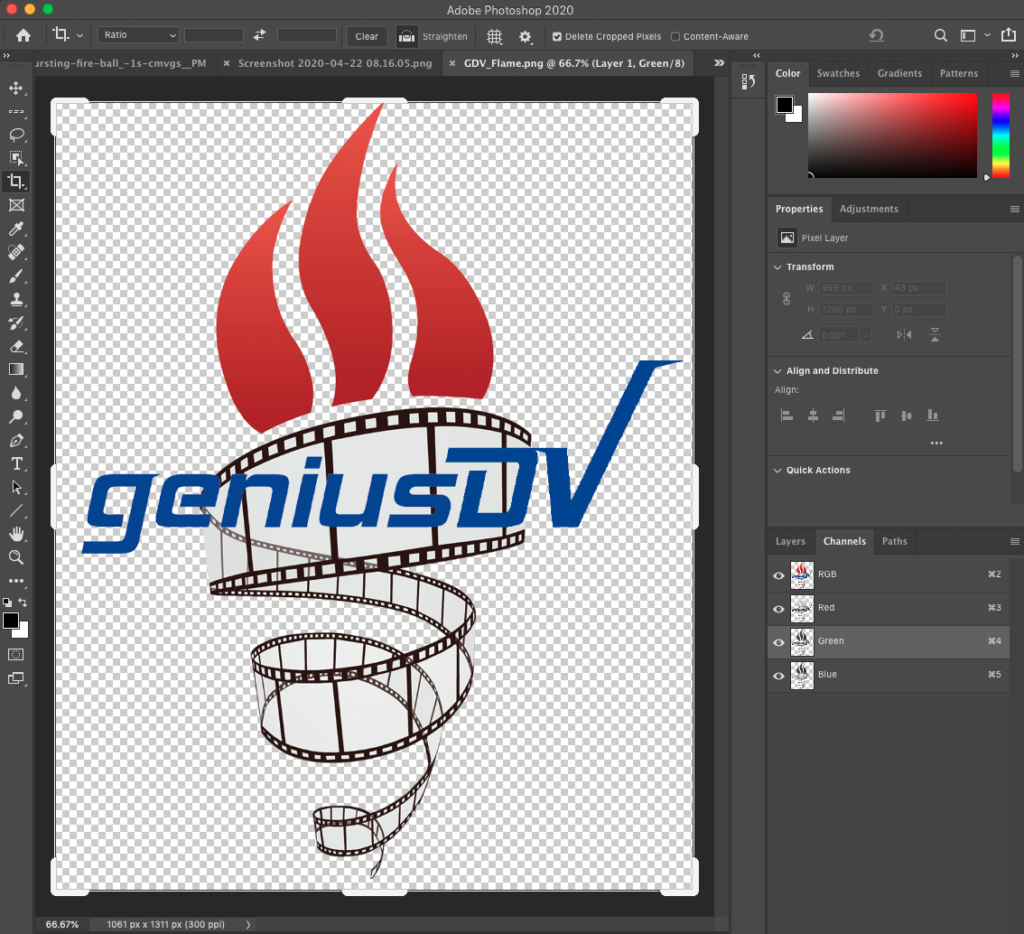
If you want to experiment with a graphic that has an Alpha Channel, you can download the GeniusDV logo.

If you are new to the concept of blending modes, there are some great websites that explain in great detail on how powerful blending modes can be.
Blending modes were traditionally geared towards working with still images. However, they provide some amazing capabilities when used with video clips.
For compositing modes to work, you need some cool backgrounds that will affect the blend of the two video layers. Footage of Fire, Water, Clouds, and Lights make for great composites as a base layer.

You can download a Free Media Composer AVX Blending Mode plug-in that provides real-time blending modes within Avid Media Composer. There are no strings attached. Click on the link above and install the plugin.
After you install the Blending Mode AVX plug-in, make sure you restart Avid Media Composer.
I’ve tested the plugin with several versions of Avid Media Composer, including up until the 2020.4 beta.In the Blending Mode Tutorial, I’m using a graphic with an Alpha Channel. However, you can use any graphic and/or foreground to blend with a layer below it.
It’s easy to create dynamic effects using blending modes in Avid Media Composer.
Take a basic logo and turn it into something like this….. with just a few clicks.
A blending mode provides effect options for how a base layer, is affected from a layer directly below it. Blending modes requires at least two video layers.
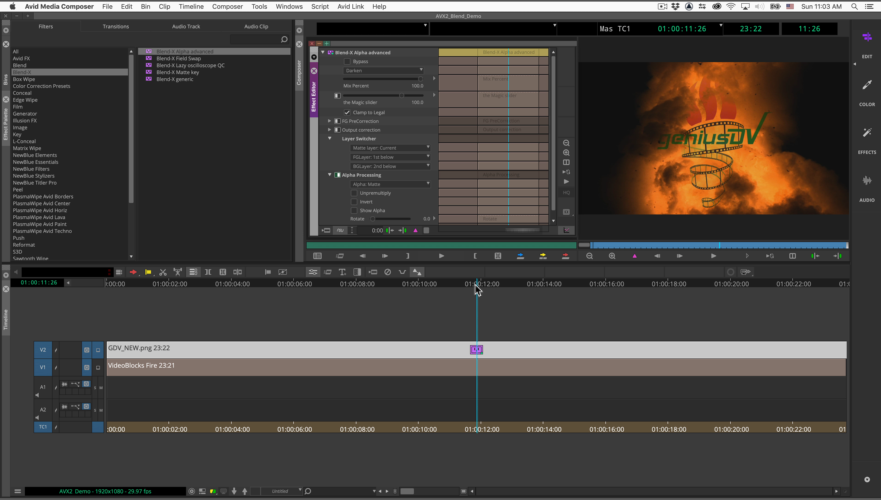
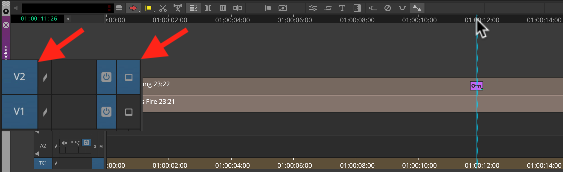
Edit any two clips directly on top of each other. Make sure the V2 sequence record track and the V2 Monitor Icon are both turned on in the timeline.
Next, drag the blend-x effect onto the V2 track. You can use either Blend X Generic, or Blend-X Alpha Advanced.
Use Blend-X Alpha Advanced if you are working with a graphic that contains an Alpha Channel. An Alpha channel means that your graphic or video clip contains areas that are transparent.
However, for this tutorial, DON’T worry, just edit ANY two clips directly on top of each other.
In General, Alpha Channels are shown as a checkerboard pattern that shows the transparent area.
If you’re not familiar with Alpha Channels, consider taking any Avid GeniusDV video editing course, and we will walk you through the process.
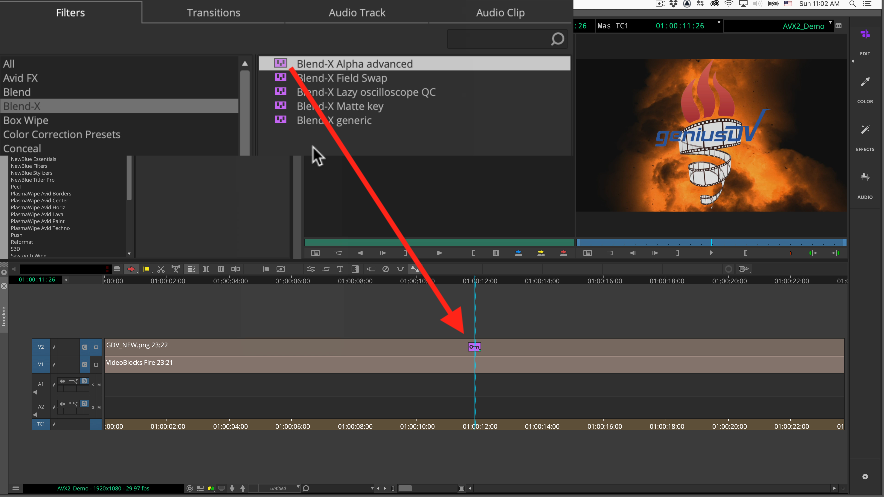
Navigate to the Tools menu and select the Effect Palette. Look for the Blend X category under the filters tab.
From the effect palette, drag the Blend-X Generic or Advanced plugin onto the clip segment that on V2.
Then click on the effect editor icon at the top of the timeline window. The icon looks like a pair of ‘seatbelts’.
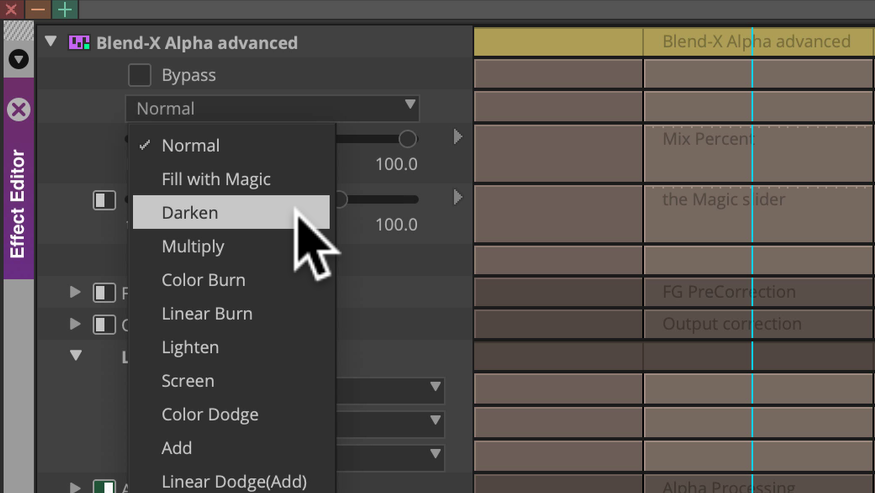
This will launch the Effect Editor Window.
Within the Effect Editor Window, choose a blend mode. In this example, I chose Darken.
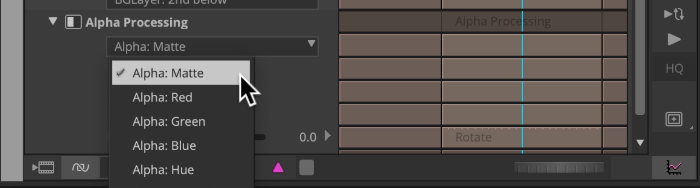
NOTE: If you are using a graphic with an alpha channel on V2, make sure you choose Alpha Matte from the Alpha Processing area.
That’s it! It’s that simple. Here’s a still from the final result.