
It’s easy to add filler to then end of an Avid Media Composer Sequence so you can match your sequence to a specific amount of time.

This is VERY useful for traditional ‘broadcast’ shows or commercials that need to be a specific length.
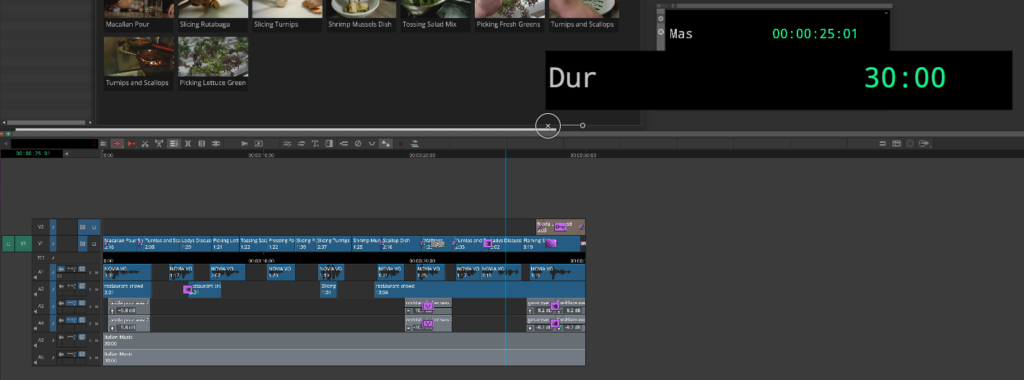
In this example, I already have a show that runs for 30 seconds, and I want to create a 60 second version of it.
Hold down the option and/or alt key and right click in the timeline area to create a new video new track.
In doing so, this will allow you to add a new empty track with any track number assigned to it.
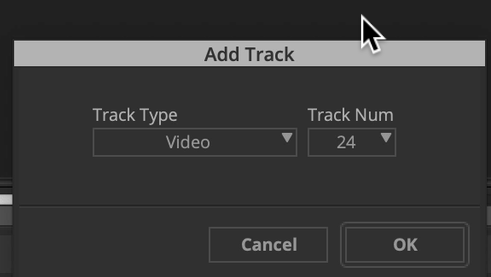
Use a track number that will exceed the normal amount of tracks that you typically use in your sequence.
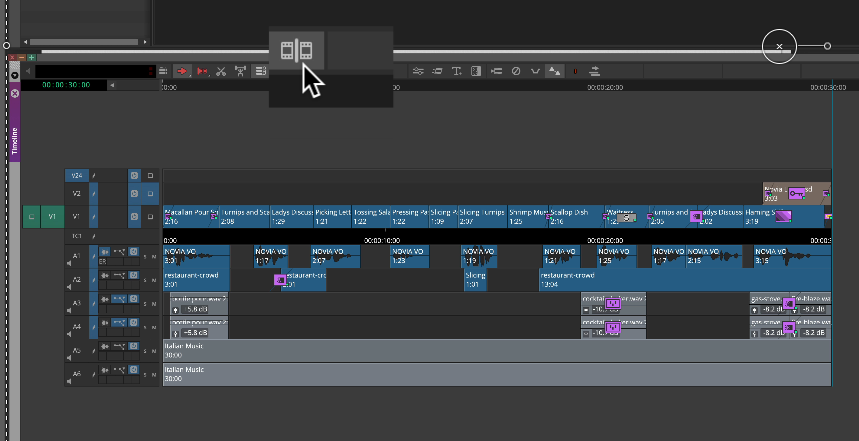
Navigate to the very end of your sequence.
Within the new empty track, make sure the new empty filler track is active.
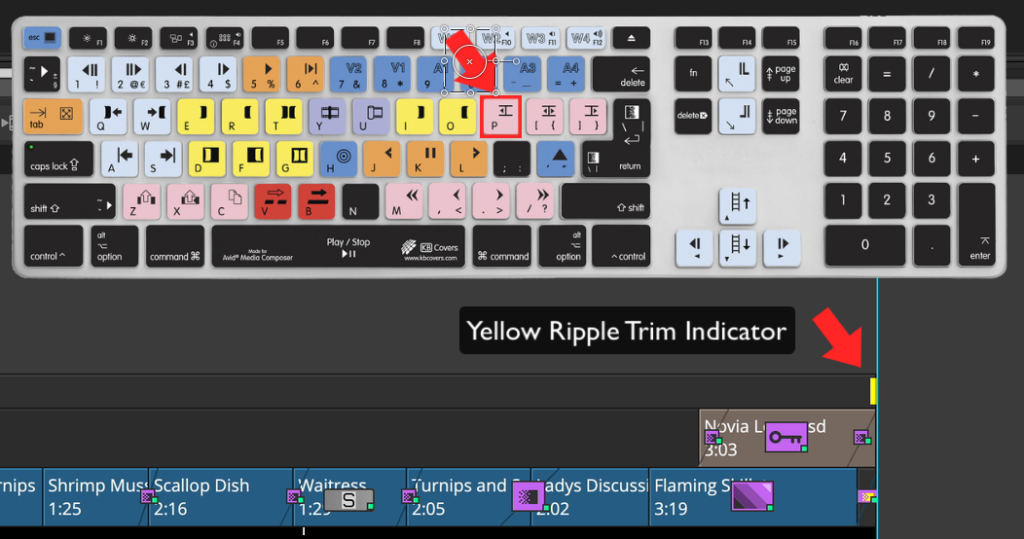
Press the Add Edit Function. Don’t worry, nothing will appear to happen.
Next, Press the P key on your keyboard. This will enter into ripple trim mode on the left side of an invisible edit point.
On your keyboard keypad, type +30:00 or whatever value you want to add as filler to the end of your sequence.
The value will appear at the bottom of your composer window.
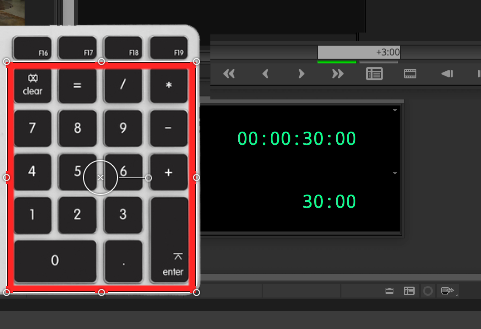
If you do not have a full-size keyboard, press the CTRL key rapidly twice. Then you can use the regular numbers below the function keys on a truncated keyboard.
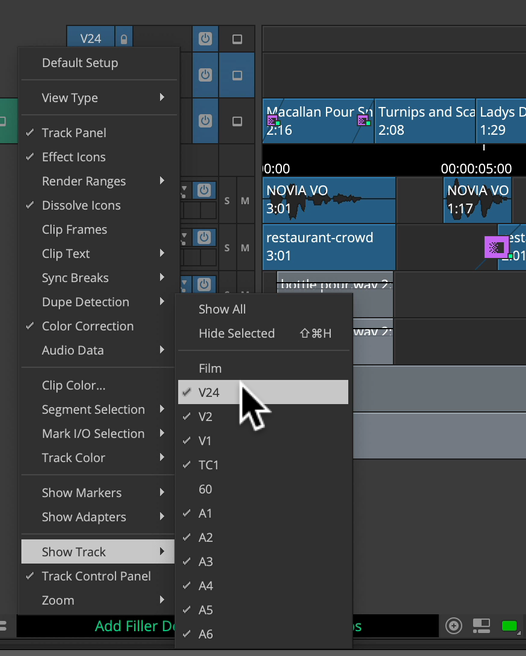
Now, you will want to lock the filler track. Right click new , and choose lock track.

Navigate to the timeline fast menu, and you can choose to hide the track if you choose.
So now, when you zoom out of your sequence, you have a fixed timeline that represents the exact amount of footage you will need to complete the spot.
