Creating object wipes in Media Composer
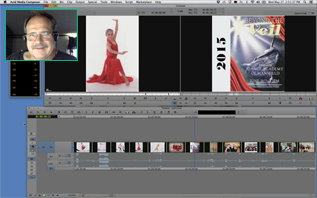
Here's a short tutorial on how to create an 'object' wipe within Avid Media Composer.
Continue reading for a full text transcript of the Media Composer tutorial.
You can create some cool transitions by combining graphics elements with a basic wipe using Avid Media Composer.
To create this effect, import an object that contains an Alpha channel. If you're using Photoshop, an easy way to remove the background is to use the Magic Eraser tool.
Just click on the background area to remove a similar color. Then save the image as a .png to retain the background information.
Okay, when you are back inside the Avid software make sure your import settings are set to 'Invert Alpha on Import'.
You can then import your graphic element that you've saved from Photoshop. Then go ahead and navigate to the effects palette within the project window.
Click on the edge wipe category.
Drag the upper left diagonal wipe between any two clips in your timeline.
Mark an in and out point at the beginning and ending points of the diagonal edge wipe.
Add another video track by using the keyboard shortcut Command Y.
Then Patch V1 to V2. Also, make sure this monitor icon is on the V2 layer.
Place your object between the in and out points within the timeline. Holding down the command key will snap it into place.
Now press the effect mode button.
Within the composer window move the playhead to the first frame. Drag your object to the upper left corner of the screen.
Then move the playhead indicator to the last frame and click on the last keyframe. Now drag your object to the bottom right corner of the screen.
Okay that's it! Back up and watch the sequence.
For other great tips like this, or to enroll in an Media Composer training course, visit GeniusDV.com

Listed below are 0 links to blogs that reference this entry: Creating object wipes in Media Composer.
TrackBack URL for this entry: http://www.geniusdv.com/weblog/mt-tb.cgi/1756
- Enrollment Cost: $50.00
- 84 Media Composer Lectures
- Includes Practice Media
- Interactive Quizzes
- Official Certificate of Completion
- 30 Day Money Back Guarantee
- Click to Enroll for 10% off!
- Enrollment Cost: $20.00
- 60 Final Cut Pro X Lectures
- Includes Practice Media
- Interactive Quizzes
- Official Certificate of Completion
- 30 Day Money Back Guarantee
- Click to Enroll